RentMy provides the ability to track rental inventory at the individual item level. We call these individually-tracked items "Assets".
An Asset provides information about a specific item in your inventory, like a unit number or other unique identifying item.
By creating an Asset, you can track the exact rental/service/purchase history of a singular item in your inventory.
Let's start with an example. Suppose you have a quantity of three video projectors in your inventory. Your customers will want to rent one of those three items, but at the time of booking, they likely won't care if they are provided with item #001, #002, or #003 (that is for you to decide at the time of fulfillment). When the order is ready for fulfillment, you can which which specific projector you wish to assign to the job. When fulfilling an order that contains a Product Asset, you will be prompted to select which of the projectors (in this example) you wish to allocate/assign to this particular rental contract.
When creating the projectors as a "Product", select to track the items "individually" in the product details screen.

Once the product is created as being tracked by assets, the available quantity is calculated by counting the assets for that product.
To create an asset, visit the Assets tab of the Product screen.

If adding just a few assets, click the Add New button to create an Asset (note: if you have several assets you need to create for a given product, you may prefer to visit the Manage Inventory > Assets link (from the lefthand navigation area) to create many assets as once).
Add the Product Asset tracking number/label (perhaps your unique barcode ID) to the "Items Serial Number" field and add the other (optional) information. Once completed, click "Submit".
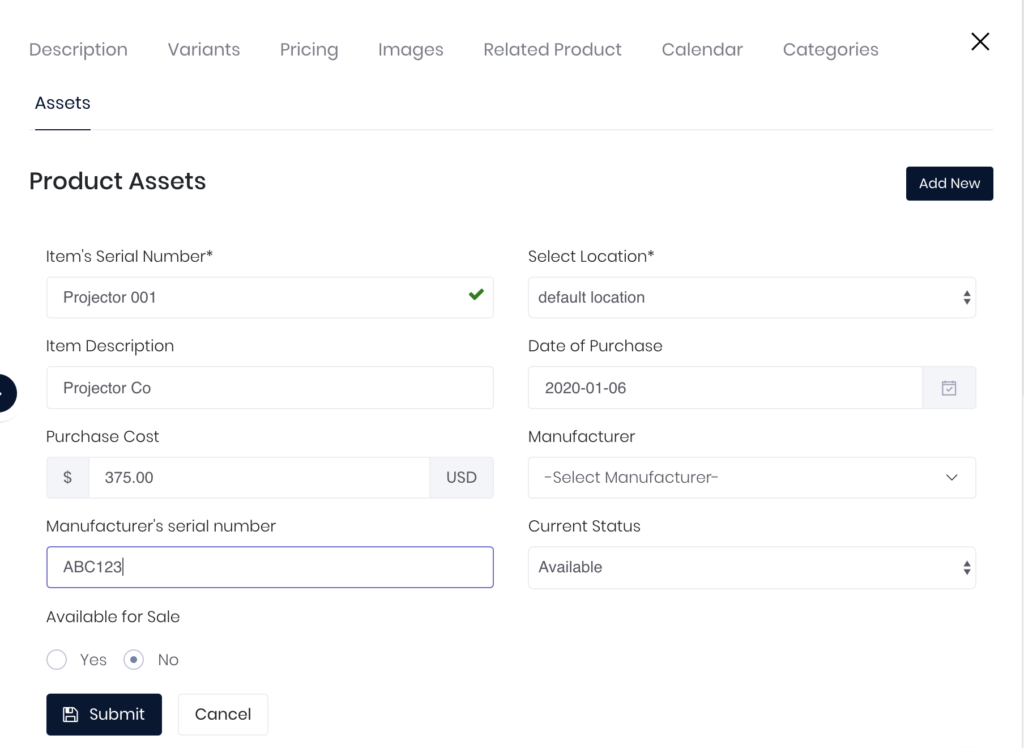
Repeat this process for as many Product Assets as you wish to track. Or, you may use the RentMy Import Inventory tool to add assets in bulk instead of individually).
Once you have created Assets for your inventory, you are ready to fulfill orders as assign inventory to jobs.
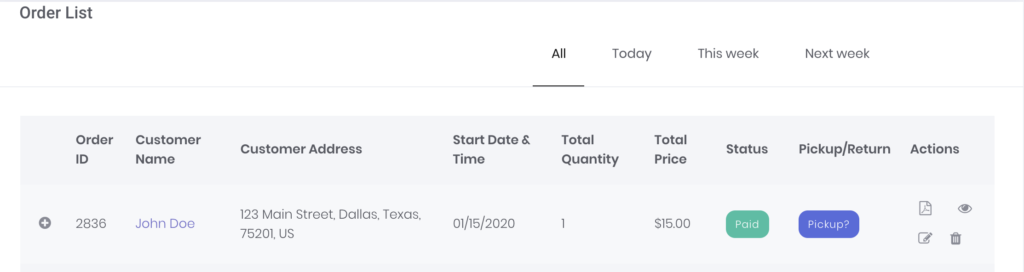
When an order for an Asset is ready for fulfillment, find the order in the Reservations screen and click the "Pickup" button.
When clicked, a screen prompting you to assign an Asset will appear
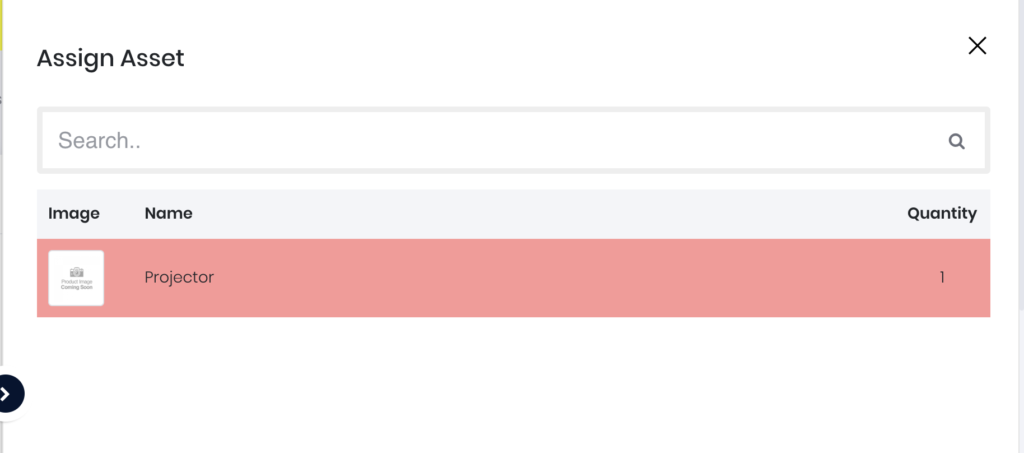
To assign an Asset to this contract, you can search for the Asset using a barcode or product name.
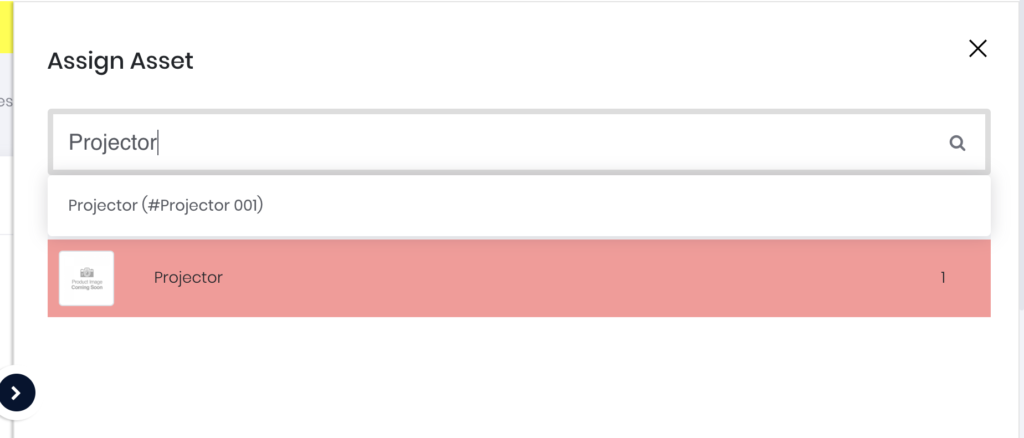
When the Asset is located, assign it to an order. RentMy will reflect that the Asset is now associated with this order.
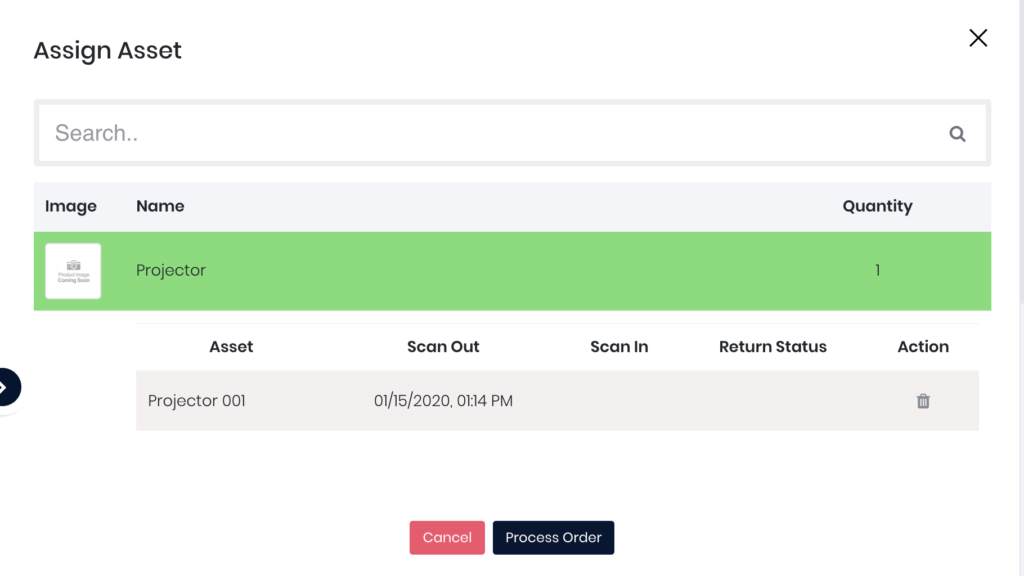
Click Process Order to complete the assignment and finalize order fulfillment.
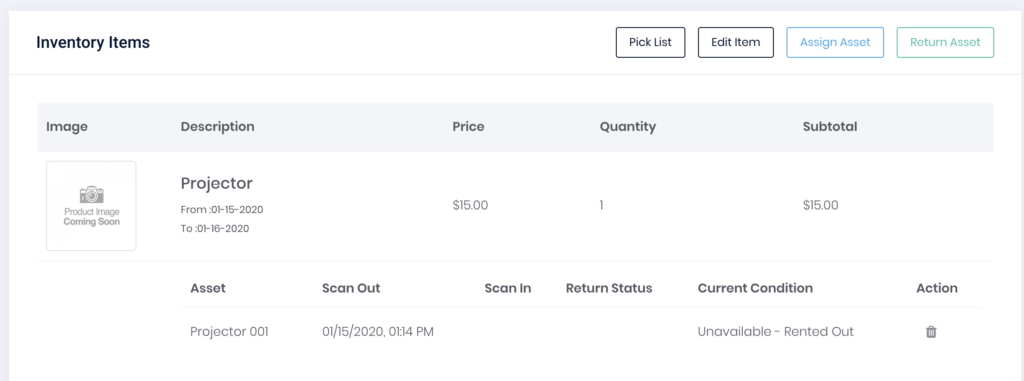
The order detail screen reflects the specific projector assigned to this job.
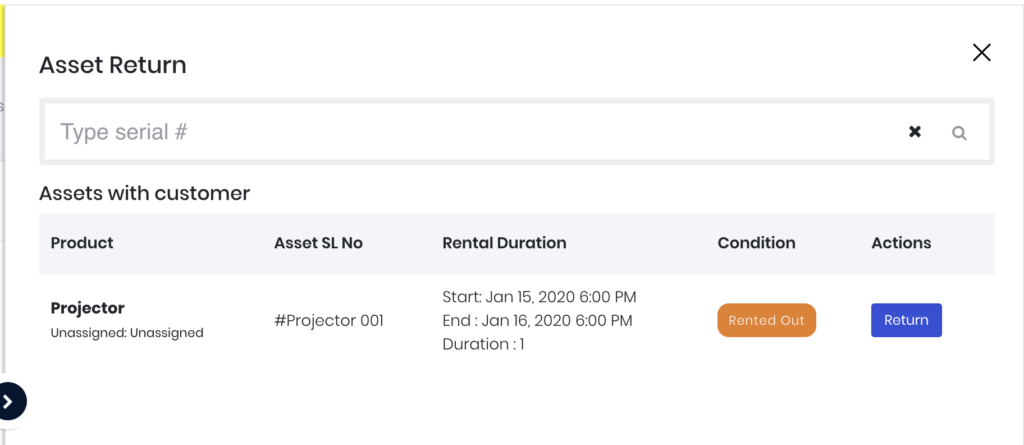
When the rental is returned, click the "Return?" button next to the order in the Reservations screen. You will be prompted to reflect that the Asset assigned to the order is being returned.
That completes the Asset rental & return process. You can find detail about the Asset's history from the Reports screen and the Assets screen located in the Manage Inventory menu.