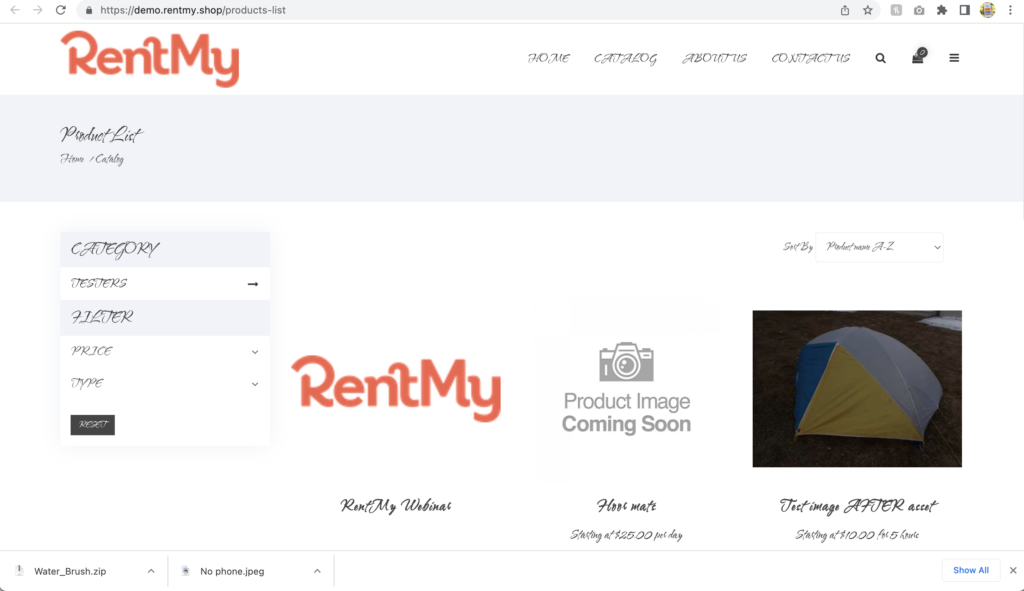
RentMy offers the option to modify the default font to meet your style/brand guidelines. Follow these simple steps to update your RentMy website:
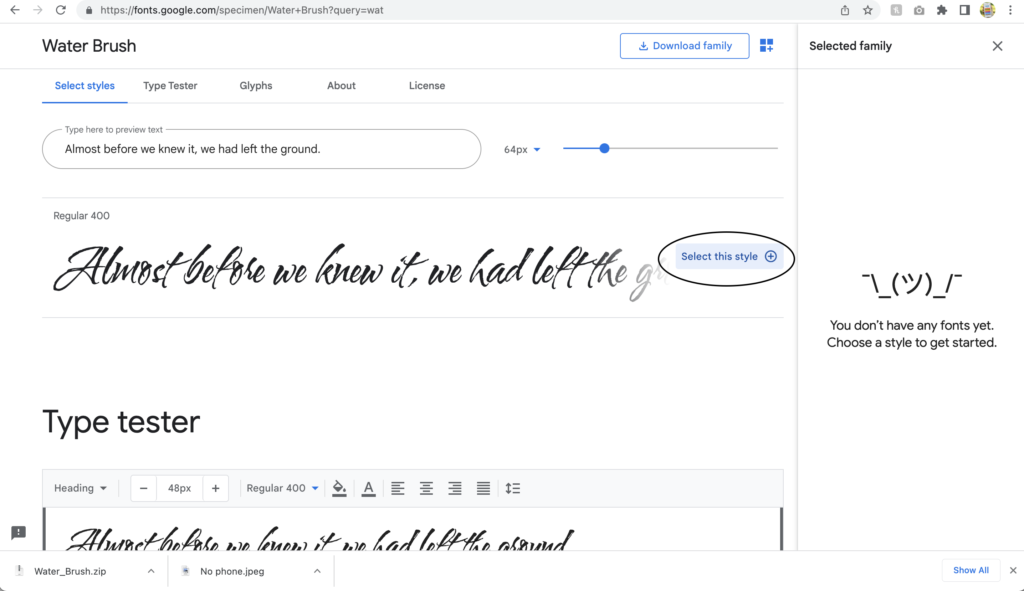
Step 1. Visit https://fonts.google.com/ and locate the desired font for your site
Step 2. Click the "Select This Style" dropdown button
Step 3. Click the Import option
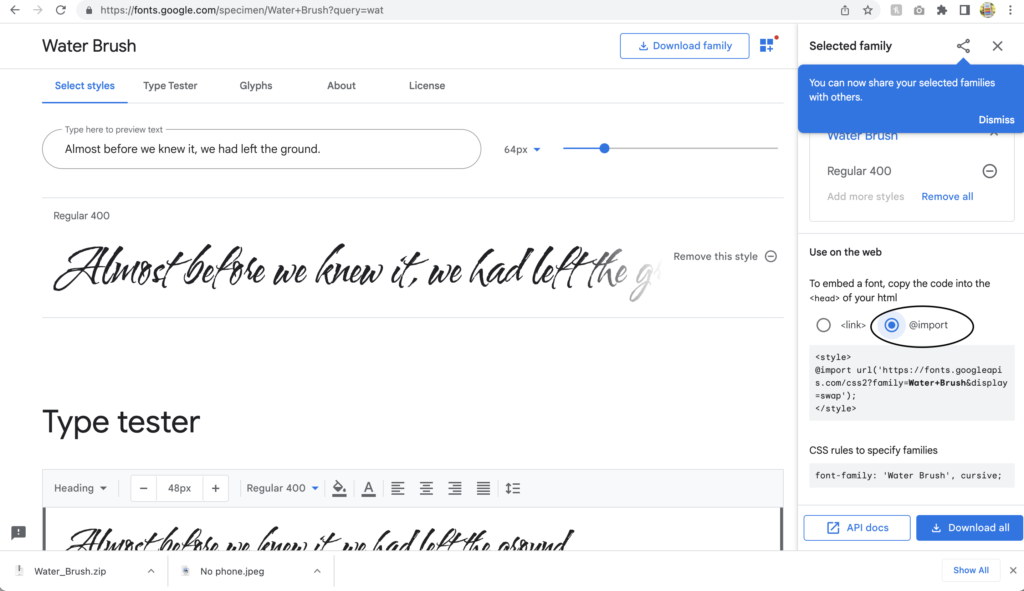
Step 4. Copy the import script and populate the template code below with the font name you want (see areas in blue where a font name is required):
@import url('https://fonts.googleapis.com/css2?family=Water+Brushwght@100;200;300;400;500;600;700&display=swap');
{
font-family: 'Water Brush', sans-serif;
}
body {
font-family: 'Water Brush', sans-serif !important;
}
h1,
h2,
h3,
h4,
h5,
h6,
span,
b,
p,
strong,
em,
label,
input,
textarea,
button,
select,
ul li,
ol li,
ul li a,
sub,
sup,
samp,
.form-control,
table tr th,
table tr td,
a {
font-family: 'Water Brush', sans-serif !important;
}
Step 5. From your RentMy Dashboard, visit the Website Settings > Design > Content & Labels menu and choose the Add custom CSS tab
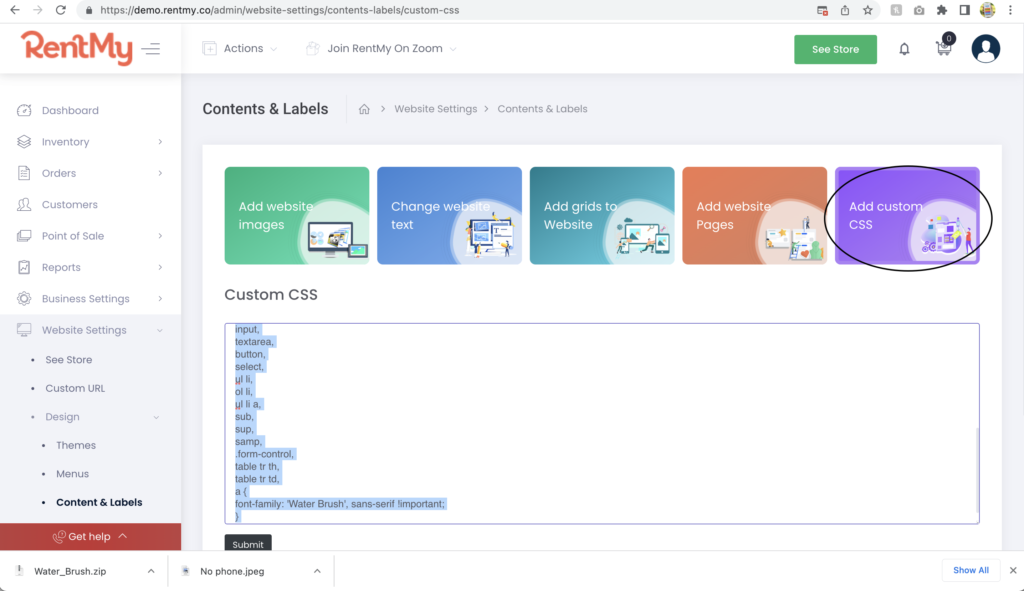
Step 6. Paste the code (above) in the field and click "Submit" to save your update.
Step 7. Click the See Your Store button at the top of your screen to see the updated style